Jump to content

TRC Timberworks

Archive for March, 2011

  • 21 March 2011

    Timber Bed – Layout

    Timber Bed - Layout

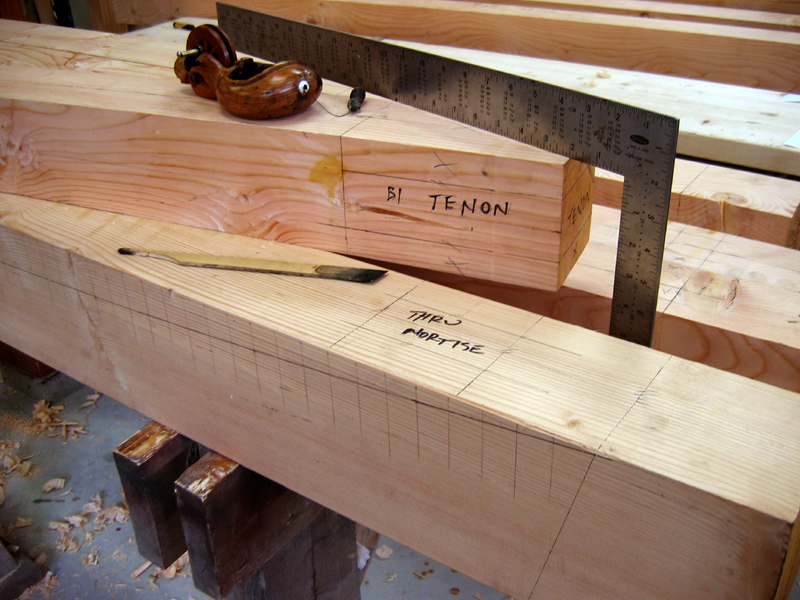
    Layout is one of the most important steps in creating timber furniture. For this project, I used the most common layout method for Japanese timber work: centre line layout. Using this method, I first find the middle of the timber on the ends and snap an ink line down the centre of the wood piece on all four sides. Once the ink lines have been set, I use these to lay out the joinery.

    Everything is measured from this centre line. For example, if I have a 2” wide mortise or tenon, I will measure 1” off either side of the centre line. In this picture you can see an example of a mortise and a tenon.

    For this bed, I designed a curve into the top beam of the head and foot boards, and to make this happen I had to get quite creative. Normally, I would just use a longer straight board or tape measure as a trammel to make the arc (For details, see the blog for Nov 22, 2010).

    The radius for the arc on the bed is over 32’, however, so this method would not work, as my shop is only 25’ wide! Instead, to draw the curve, I plotted out a graph on the computer and then drew it on the timber to full scale. After this, I found all the points that landed on an intersection and put an “x” on these spots. I then connected all these points using the blending curve tool I have for smaller arcs, moving the blending tool four times to draw the full arc.

    Share
  • 14 March 2011

    Timber Bed – First Things First

    Timber Bed - First Things First

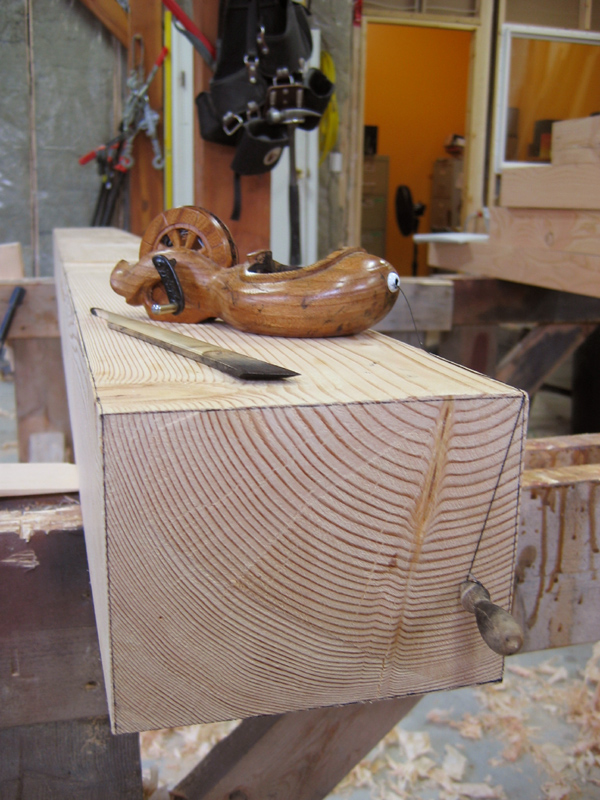
    The first step I needed to do with this project was to straighten and square the timbers. I ordered the timbers planed from the mill, but because the wood sat in my shop for quite some time, the timbers twisted and warped a bit on me. To correct this, I used a level and found a new ideal timber inside the old one. For most of the pieces, I had to resize them down about 3/16” to ¼” to get them to fit.

    After using the level to draw the lines for the top and one side, I used a ruler to measure over and make the other two lines to complete the new timber. After this, I snapped ink lines down the sides and hand planed down to those lines.

    This process proved to be quite time intensive but worth it to make the joinery fit better.

    Share
  • 12 March 2011

    Timber Bed – Hand Tools

    Timber Bed - Hand Tools

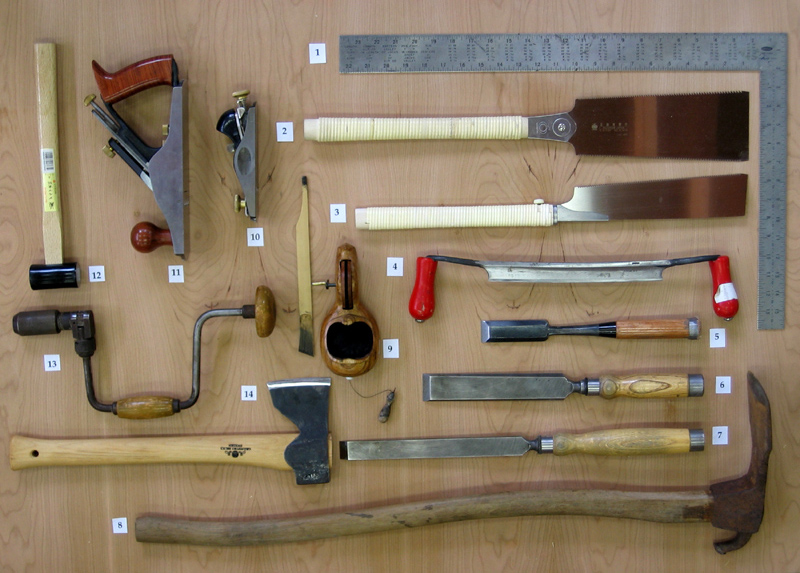
    These are the hand tools that I am going to use for the timber bed project. I didn’t include everything, like a pencil or a utility knife, but I did include the majority of the tools I am going to use. They have all been numbered for reference; see below for descriptions.

    1. Framing Square – Used for the majority of the layout on the timbers along with a tape measure.
    2. Japanese Ryoba Pull Saw – Designed to cut on the pull stroke, thus it has a much thinner blade than a western saw. This aids in the speed of the cut. The saw is two sided – one side for rip cuts and one side for cross cuts.
    3. Japanese Dozuki Saw – Thicker than the above saw for sawing through plywood.
    4. Australian Draw Knife – Used in a pulling fashion. I will be using it to aid in cutting the curves on the top beams of the bed.
    5. Japanese Timber Chisel – The Japanese make some of the best chisels I know of, accomplished by laminating a softer iron to the harder cutting steel to produce a chisel that is both strong and will hold a keen edge longer than most other chisels.
    6. 1 ½” North American Bevel Edge Framing Chisel – This chisel is used as a general use chisel to clean out mortises and clean up tenons. It also excels at getting into the corners of mortises because of the beveled edge.
    7. 1” North American Framing Chisel – Also used as a general-purpose chisel or as a slick because of its long length. This chisel is great for working end grain. (Not shown: 2” North American Chisel, great for cleaning up tenons).
    8. Adze – Used to help scoop out wood for curves and general smoothing.
    9. Japanese Traditional Ink Line (Sumitsubo) – This tool is like a chalk line, only it uses water-based ink instead of chalk. It is used in combination with a Sumisashi, a traditional bamboo marking pen.
    10. Low Angle Block Plane – This tool is used for general planing needs and excels at cutting end grain.
    11. #4 Smooth Plane – This is a very versatile plane. It can be used for general shaping, smoothing, and finishing.
    12.Japanese Chisel Mallet – This mallet is similar to a dead blow hammer. It is laminated similar to the Japanese chisels. The softer inner iron encased with harder steel produces a mass that directs more force into the chisel.
    13. 10” Swing Hand Drill – This drill will be used for any drilling needed on the project.
    14. German Carpenters Axe – This axe is specially designed for working in dry wood. It has a lower ground angle than a felling axe and is smaller to help with controlled use.

    Share
  • 9 March 2011

    Custom Hand-Cut Bed Frame

    Custom Hand-Cut Bed Frame

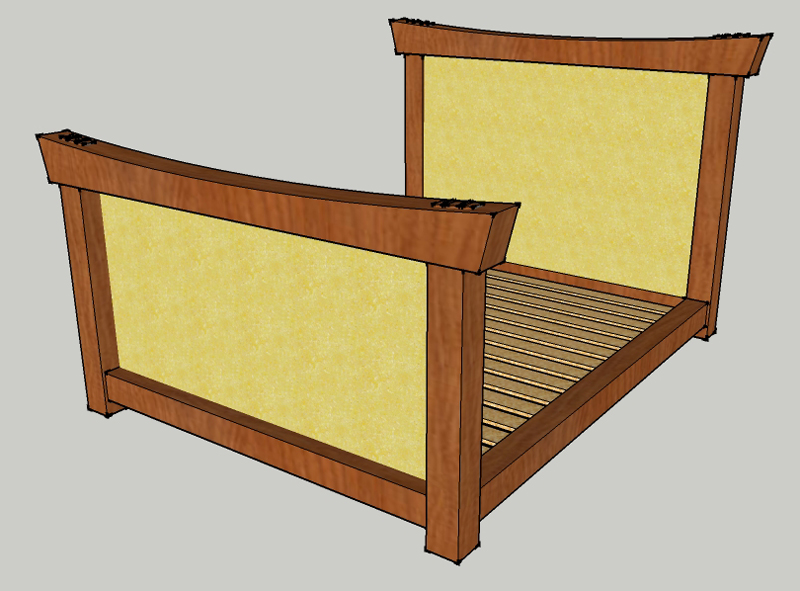
    I am starting a project to build an Asian influenced timber bed. I am going to do this project all with human-powered hand tools, no power tools at all. I am looking forward to putting away the noisy tools and exploring the techniques and precision of hand tools.

    I have wanted to do this project for 2 ½ years now as a wedding gift for my brother and his wife, and I now have the time to focus on creating the bed in the peaceful, meditative way that is fostered by using hand tools. As well as being hand cut, I am going to be using all wooden joinery – no metal fasteners.

    To date I have used primarily power tools for timber framing, so many of the traditional hand-powered tools I will be using are new to me. If anyone has any suggestions or ideas on how I might do things better or differently, please feel free to e-mail me your suggestions at: info@trctimberworks.com

    Check back often for updates on my progress.

    Share