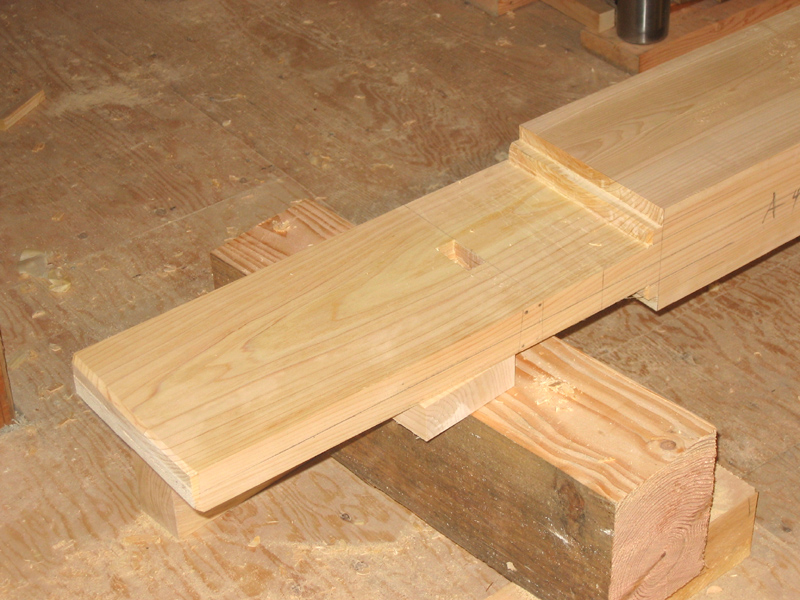
Layout is one of the most important steps in creating timber furniture. For this project, I used the most common layout method for Japanese timber work: centre line layout. Using this method, I first find the middle of the timber on the ends and snap an ink line down the centre of the wood piece on all four sides. Once the ink lines have been set, I use these to lay out the joinery.
Everything is measured from this centre line. For example, if I have a 2” wide mortise or tenon, I will measure 1” off either side of the centre line. In this picture you can see an example of a mortise and a tenon.
For this bed, I designed a curve into the top beam of the head and foot boards, and to make this happen I had to get quite creative. Normally, I would just use a longer straight board or tape measure as a trammel to make the arc (For details, see the blog for Nov 22, 2010).
The radius for the arc on the bed is over 32’, however, so this method would not work, as my shop is only 25’ wide! Instead, to draw the curve, I plotted out a graph on the computer and then drew it on the timber to full scale. After this, I found all the points that landed on an intersection and put an “x” on these spots. I then connected all these points using the blending curve tool I have for smaller arcs, moving the blending tool four times to draw the full arc.