Archive for July, 2011
-
31 July 2011
Lancelot
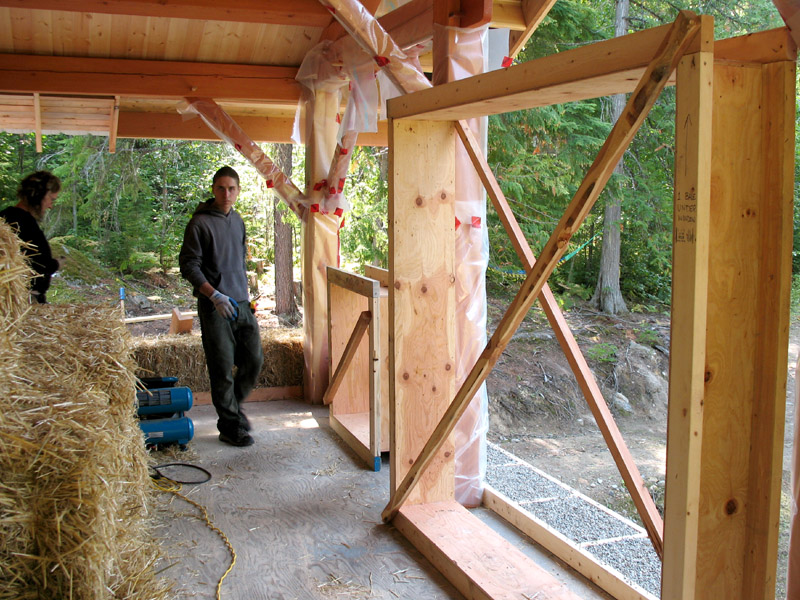
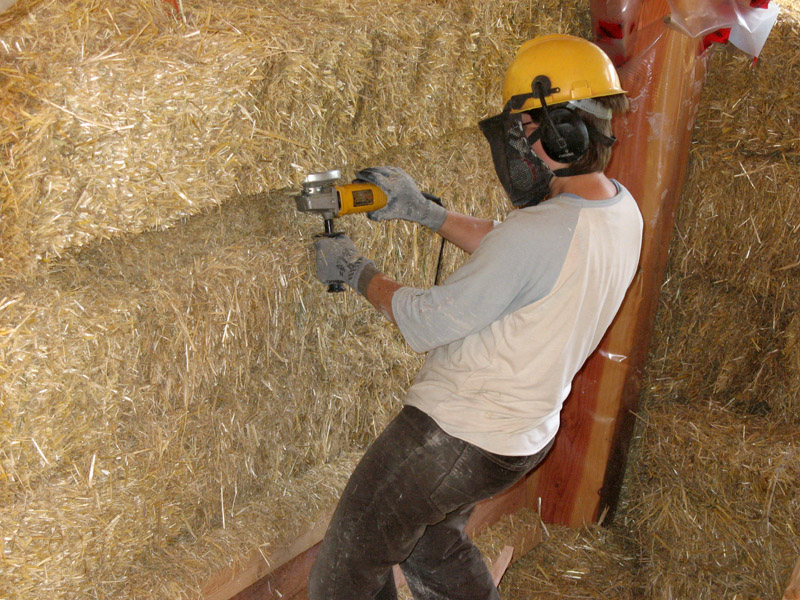
Here is Raina using a Lancelot tool on a bale wall. Notice the important safety helmet and earmuffs. Good job, Raina!
The Lancelot is actually a small chain saw, so it’s not a joke about using safety gear. These are great tools for carving out channels in the bales for electrical wiring or for installing I-beams. And flying bits of straw will go everywhere, so use a dust mask as well under the safety visor.
I-beams get placed in the wall between courses of bales as attachment spots for cabinetry or shelving. There are no wooden studs in a straw bale house that has a timber frame. And the plaster itself is not strong enough to mount anything heavier than a picture frame. So wooden I-beams lie in the walls secured by the weight of the bales above them, and shelves or cabinets can then be attached to these.
Just remember to mark where in the wall you placed the I-beams, so you will know later where to drill! Taking photos is a big help, as well as keeping a written record with the measurements of I-beam placement.
-
28 July 2011
Finished Stacking
A standard wall consists of bales stacked seven courses high. Going any higher than this requires extra stabilizing measures to ensure that the wall will not bow.
The peaks of the gable ends in this house ended up being eleven courses high, so we built a wooden I-beam and installed it on top of the seventh course, securely attaching it to the timber frame structure. We then stacked the bales in the triangle of the gable on top of this I-beam, which added the necessary structural rigidity to that section of the wall.
Another key area to pay attention to in the gable end is ensuring that the custom bales for the triangular sections are made tight enough and in the right size and shape to maintain stability in the wall. Bales retied in custom sizes should be as close to the original rigidity of the bales off the field as possible, and they need to properly fit the hole they are meant to fill.
One of the absolute joys of baling is the lack of waste material after the walls are built. There are no trips to the dump with cutoffs of dimensional building materials. There are no burn piles or scrap piles. Only some extra mulch for your garden. Or the straw needed for the natural plaster you are about to mix and apply to your wall. How great is that?!
-
24 July 2011
Stacking the Bales
Oh, the joy of stacking bales! It goes so quickly at this stage that everyone in a work party gets excited and everything flows really well. Getting a good system going to ensure there are people busy on each wall as well as a few people making custom bales for around window or door bucks is important to keep up this fast pace.
The work party on this part of the baling consisted of about 5 to 10 people at any time of the day, and the main part of the baling was done in about a day and a half.
We used 1″ x 1″ wooden stakes driven down through the courses of bales to stabilize the walls as they went up. The stakes were about 3 feet long each, and we started using them as we stacked the third course of bales. Other methods are possible to stabilize the walls during this phase, such as bamboo stakes. Neither wood nor bamboo will draw condensation; we don’t use rebar for this reason.
The bales were also securely tied to the timber frame structure, and the plaster stage will further solidify the walls.
-
21 July 2011
First Course of Bales
The bales are stacked starting with the entire first course (row), going all the way around the perimeter of the building. This is the beginning of the exciting part, as all the preparations begin to pay off and you see results a lot more quickly.
The bales are placed tightly together, and custom sized bales are tied for the areas next to window or door bucks where the dimensions do not exactly fit the length of a bale. Ensuring that all the people who are stacking bales are maintaining a uniform standard of placement also makes it much easier to shape and finish the walls later on for the plaster stage.
Consider where you store your straw bales as you get ready for baling. The closer they are to hand for each wall, the less labour that is used to get them to the wall – especially considering hills or stairs. Bales can get heavy if you are lugging them around all day, and if you have a work party of friends and family or a workshop of participants to help with your labour efforts, you will want to conserve their energy to ensure they last for the whole baling process, rather than burning out from hauling bales from a distant storage shed.
-
18 July 2011
Window Buck Placement
The placement heights of windows can be determined ahead of time in the design of the plans, although the nature of bale building means that the most efficient height placement of windows follows the heights of courses (rows) of bales. This way, fewer labour-intensive custom sized bales need to be made.
If you know ahead of time the size of the straw bales you will be using, this can be factored into the design plans. But if bales are sourced after plans are drawn and end up being a different height, slight adjustments in window heights may be useful to ensure a faster baling process.
Window bucks are built before baling begins and braced to ensure they remain square as they are placed in the walls. In this case, we stapled burlap around the outside of the window bucks and then tightly stuffed the perimeter of the bucks with light clay straw as insulation around the windows. However, other methods of insulating around the windows may be used, depending on the materials available, the time frame allowance, and the preference of the owners or builders.
-
15 July 2011
Prep for Baling
It’s exciting to start stacking the bales, and taking the time to pay attention to the preparations for baling ensures that the whole project will be a success.
The second floor of this house is to have straw bale insulation, and a proper foundation for the bales is vital to keep out unwanted critters and ensure moisture drains out of the wall in the rare event that water enters due to extreme weather or a roof leakage.
In this case, a wooden ladder system is built flat on top of the subfloor around the perimeter of the building to hold the pea gravel. Under the gravel, holes are drilled in the subfloor (similar to the drainage holes in cedar soffit) and covered with screen to allow drainage without letting in any rodents or birds. The subfloor is cantilevered out 12″ from the first floor wall, so the holes drain to the outside of the building.
-
8 July 2011
The Bales Arrive!
An exciting day when the bales arrive…. now to stack them under cover!
An advantage to having the roof built on a timber structure before the bales arrive is knowing that the straw will be protected from the weather. This roof was designed to have 3′ overhangs to keep driving rain and snow off the straw bale walls once they are stacked and plastered.
It is important to consider the design of the roof in relation to the weather at your house site. The gable ends provide the least protection to the bale walls from weather, as the peak of the roof is so much higher than the bottom of those walls. So it is best to orient your roof with the gable ends not facing into prevailing winds.


