Subscribe to our blog!
Posts Tagged ‘Roofs’
-
8 July 2011
The Bales Arrive!
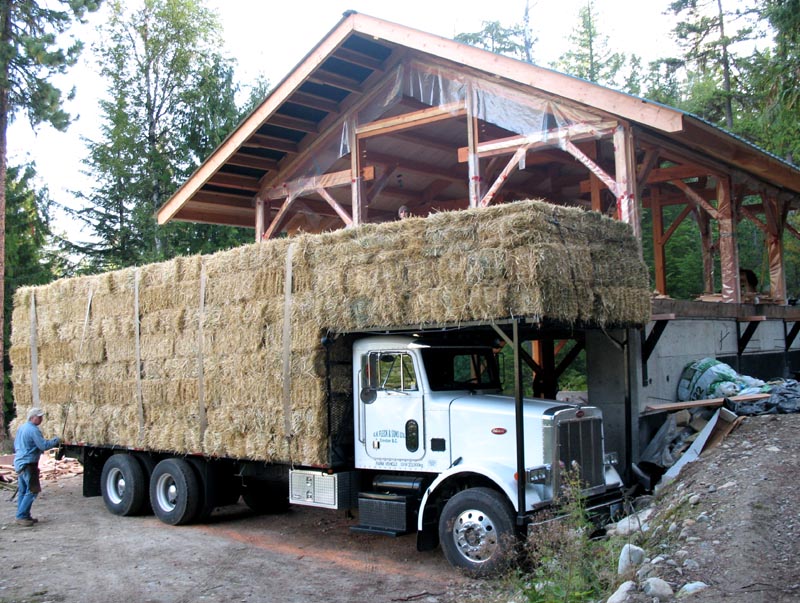
An exciting day when the bales arrive…. now to stack them under cover!
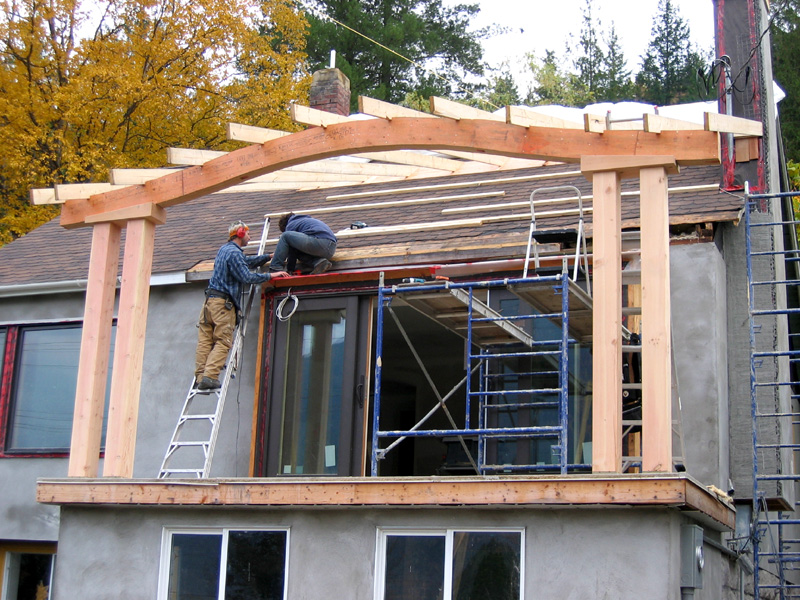
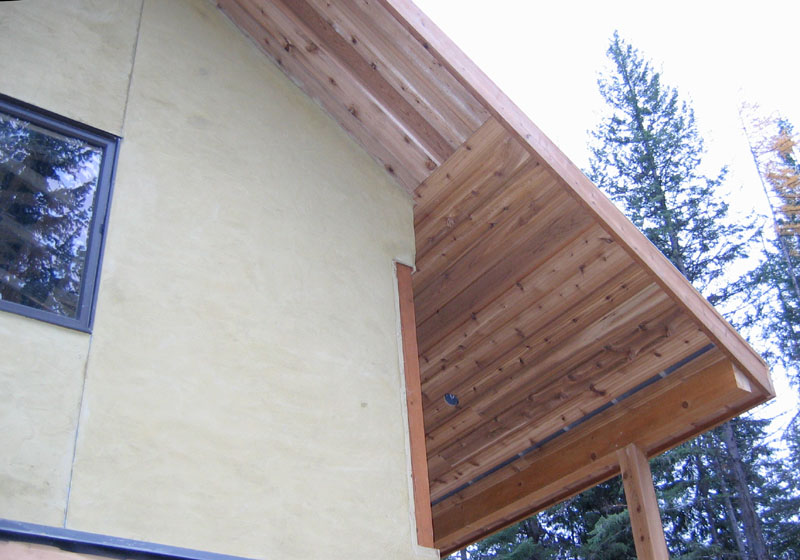
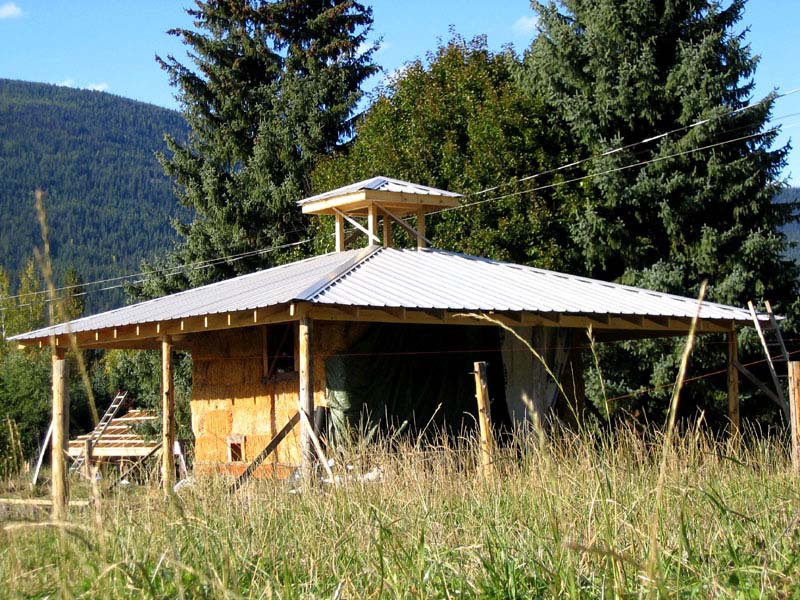
An advantage to having the roof built on a timber structure before the bales arrive is knowing that the straw will be protected from the weather. This roof was designed to have 3′ overhangs to keep driving rain and snow off the straw bale walls once they are stacked and plastered.
It is important to consider the design of the roof in relation to the weather at your house site. The gable ends provide the least protection to the bale walls from weather, as the peak of the roof is so much higher than the bottom of those walls. So it is best to orient your roof with the gable ends not facing into prevailing winds.
-
30 October 2010
Curved Beam Rafters
The rafters were the brain exercise on this curved roof, as the birdsmouths and end cuts changed on each one. Every rafter had to be calculated precisely and custom cut to ensure they would properly fit the angles of the curve.
At each end of the deck, two posts topped with a “pillow block” cut to the angle of the beam were installed to accommodate the curve.
-
19 October 2010
Curved Beam For Deck Roof
Two different radiuses were used to create the elegant arch for this curved deck roof beam. The centre of the beam was layed out with a 12′ radius, and the ends were layed out using a 32′ radius.
The beam was cut with a chain saw inserted into a specially fabricated base plate to hold the chain square. We cut 1/8″ from the line with the chain saw and finished the beam precisely to the line with a belt sander.
This photo shows the cut beam being sanded on saw horses outside the shop.
-
15 October 2010
Laminating Curved Beam
Part of the remodel we are doing in Nelson calls for a covered deck with a curved roof. Using a solid timber to create this beam would have required an enormous old growth tree and lots of cut off waste, so we used a different strategy to mitigate waste and achieve the complex curve.
We created the beam using three layers of 12″ x 1 3/4″ LVLs (Laminated Veneer Lumber). We were able to use seven shorter sections pieced together to reduce the amount of waste during cutting. Screws and LePage Green Series (low VOC) subfloor & deck adhesive were used to laminate the sections together.
-
11 November 2009
Cedar Soffit
The cedar soffit on this straw bale house has a one and a half inch vent running the length of the overhang to allow for the air flow through the roof structure. The vent has screen behind it to prevent entry of insects or small animals to the roof cavity.
Recessed lighting in the soffit was added to illuminate the front door. Both the cedar soffit and fascia were coated with Broda stain, which is an environmentally sound product for finishing wood on exterior applications.
-
9 October 2009
Hip Roof with Cupola
To protect the straw bale walls on this studio from direct exposure to precipitation, the roof was built with large overhangs. This will also provide covered porch space around the perimeter of the studio for the owner to enjoy during inclement weather.
The studio has a small footprint – only 169 square feet to the outside of the straw bale walls. Without any of the long rectangular spans inherent in a larger building, installing the sheet metal roofing involved a lot of angle cutting to fit the hip roof framing and cupola, and this took more time to finish.
Despite the higher labour costs, the owner was very happy with the result, and she is excited to plaster the bales and start using the building.
-
7 October 2009
Framing of Hip Roof with Cupola
The framing for this roof is a symmetrical hip roof with large overhangs and a cupola. In order to allow for the cupola, the framing of the roof does not extend to the peak. This makes the framing a bit more complicated, but it accomplishes the owner’s goal of an unrestricted view of the cupola from the interior of the building.
The owner intends to use this building for a studio, so it is situated near her home. She plans to put windows in the cupola for increased natural lighting.
-
19 July 2009
Roof Replacement
The family that bought this house found what they thought was a minor roof leak causing a discolouring of the ceiling drywall. After inspection, they realized that the roof had been built without tar paper, causing major leak and insulation issues.
The wet batt insulation needed to be removed, so the owners decided to have it replaced with soy-based spray foam. The soy-based foam can be a greener choice over standard spray foam, and it acts as a vapour barrier as well.
The entire roof was taken off to allow for the new insulation, and then new Ribloc metal roofing was installed. When the Ribloc sheets are installed, the roofing screws are hidden, eliminating the need to replace screws every decade to prevent leaks.
At the same time, we replaced the skylights in the roof, as the original ones had some problems and had been leaking as well.


