Archive for April, 2011
-
16 April 2011
Sharp Tools
I can’t stress enough the importance of sharpening your tools. A sharp tool not only works better, it is safer as well. And when I say sharp, I mean shaving your beard sharp. I get this edge using Japanese water stones. I start with a 1200 grit (800 if the tool has nicks in it). I do all my sharpening free hand. I feel once this skill is learned, hand sharpening is much faster than using a guide.
I start by sharpening the bevel until I can feel a burr on the under side. At this point I move to a 4000 grit stone for honing. I work the bevel until it has a nice sheen across the full surface of the bevel. I then move to a 8000 grit stone for the polish. If I am sharpening a chisel or plane iron, I will flip over the blade and take the burr off. I will do about 10 strokes and then turn it over to the bevel and continue. I start with a fairly heavy pressure, and over a series of flips, work down to a very soft pressure. This creates the razor sharp cutting edge.
-
14 April 2011
Carpenter’s Axe
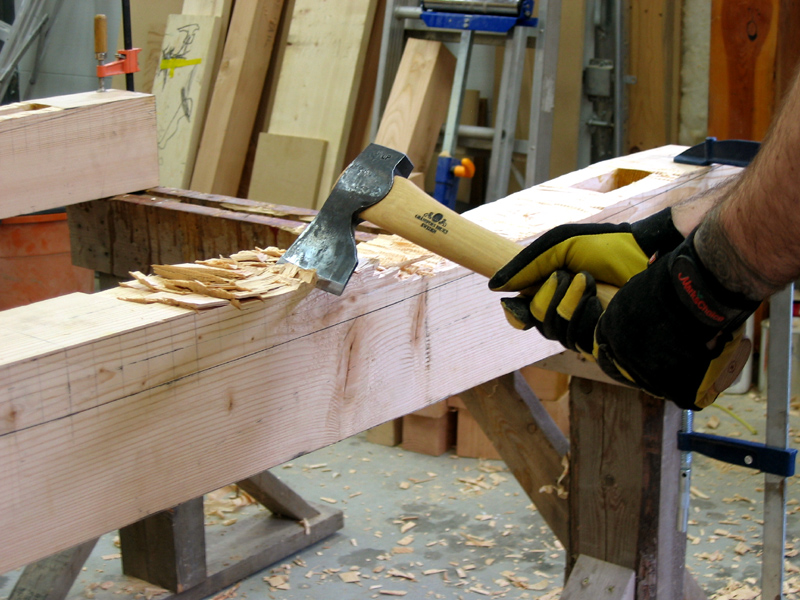
Okay, so I said in an earlier blog that my favorite hand tool was a Japanese hand saw. It’s got competition now. After using this axe, I think I have a new favorite. This axe was an absolute delight to use. Very well balanced and great to hold in my hands! Made by Gransfors Bruks of Sweden, it was hand-forged and stamped with the maker’s initials. After receiving the axe, I went online and saw a picture of craftsman who made my axe, giving me an even greater respect for the tool! I am now an axe advocate, eating up any information I can find on axes and their uses! Axe throwing anyone?
To make the curve in the top beams of the head/foot boards, I started by wasting out the material to about an 1/8” from the line. From there, I used a draw knife to clean right to the line. The draw knife left a beautiful scalloped look on the top of the beam. Very nice to run your hands over! At first I tried using an adze to finish scooping out the curve. I don’t know if it was the fact that I have never used one before and there is a technique I don’t know, but I could not get the adze to work like I wanted it to. I have found it quite difficult to find any information online about how to use one, so I’ll have to keep looking.
-
12 April 2011
Mushroomed Chisel Handle
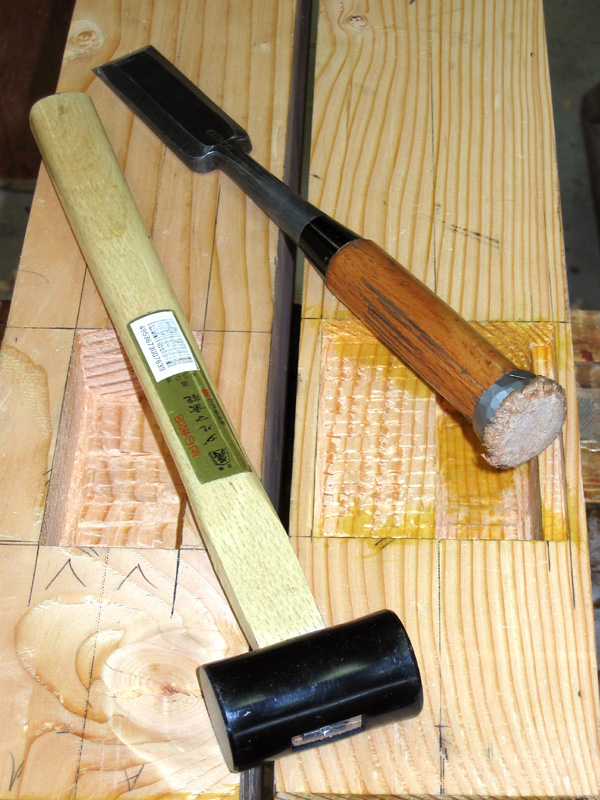
I thought I would add a blog about my Japanese chisel handles. Everyone asks me if I have pounded the hell out of my chisels, and well, yes I have, but, the handles are not mushroomed because of this.
I actually mushroom the handle on purpose. This is done because the mallet used is metal. You don’t want to smash a metal mallet onto the metal ring near the end of the handle of the chisel. This would just trash the mallet quite quickly. So the wood of the handle is mushroomed over the ring to protect it and the mallet.
The Japanese mallets are made with two types of steel. The inside of the mallet is a softer iron, while the outside is a harder steel. This creates a mass that is similar to a dead blow hammer. It transfers more force into the chisel resulting in more effective cutting.
-
10 April 2011
Old School Mortising
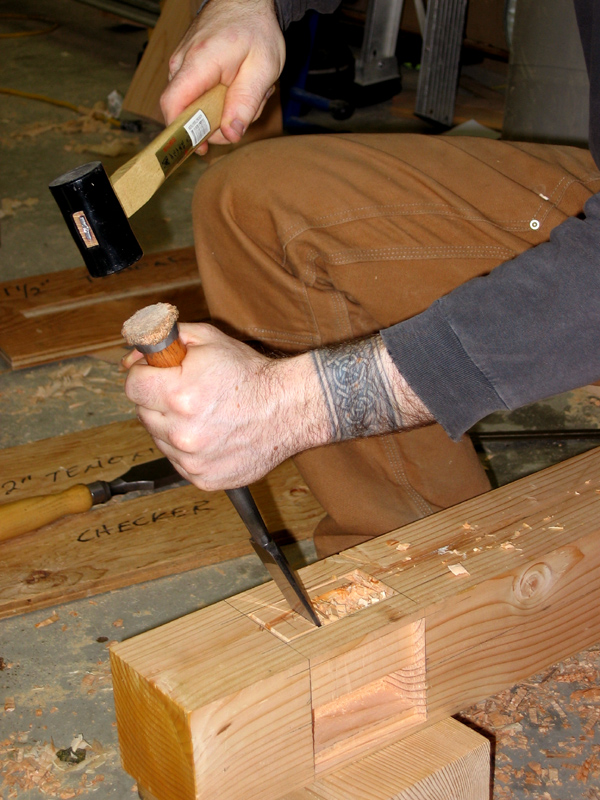
Because I wanted a true historical hand tool experience on this project, I decided to waste out the material of the mortises with nothing but a couple of chisels and a mallet. Whew, that took some determination! In the end, though, it was fun. It is a great experience to see just what it took to build without any electricity.
To waste out the material, I start by making a line with the chisel about 1/8” from the line. I then work in a series of cuts about ½” deep, ¼” apart. I work through the length of the mortise and then clean the chunks out. I continue down until my desired depth. Most of the mortises on this frame were 2” deep.
Another way to do mortises the old school way is to use a Boring Machine. In this video you can see how the machine works. This is a very slick machine; the guy here is driving a 2” auger bit, something a power drill has a very hard time doing. You will see that he has a fairly easy time of it. You need a ¾” power drill for a bit that big, a bigger drill than carpenters usually have.
One more tool for the list!
-
8 April 2011
The (Wood) Sorceror’s Apprentice
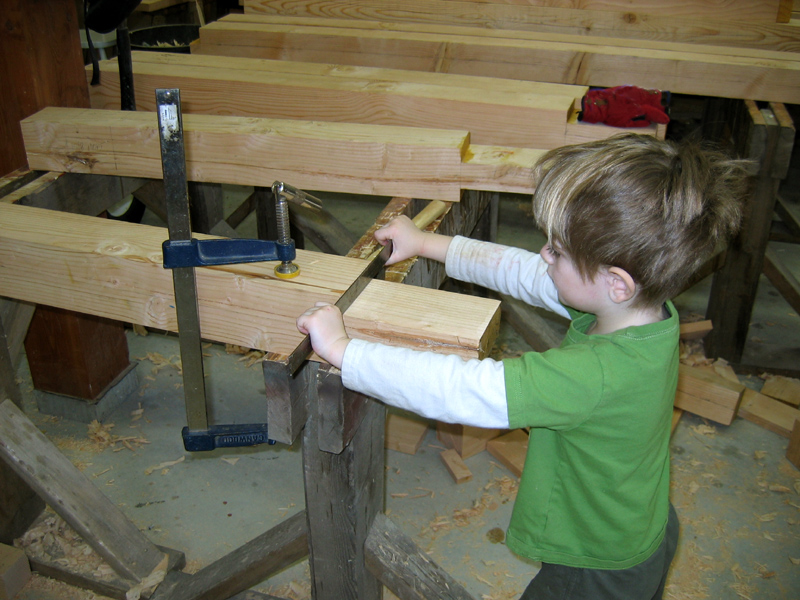
My very best helper! My son Roghan loves to be in the shop with me. He sucks up every little bit of information he can, very eager to help at every chance he gets.
Here you can see him making sure that my chisel work on the tenon is straight and square. He’s a tough critic. Makes sure everything is just right!
So far none of my tools have got up and started trying to work by the apprentice’s magic, (although it might be nice!) But I don’t think Roghan is too far off from spinning his own magic with wood!
-
6 April 2011
Timber Bed – Cutting Joinery
The Japanese hand saw is one of my favorite hand tools. The Japanese hand saw differs from a western saw in that you cut on the pull stroke, not the push stroke. Because the saw is being pulled, the blade is much thinner. This makes for a much faster cut, as less material has to be removed to obtain the same result. Also, with the saw shown in the picture, one side is for crosscuts, and the other side is for rip cuts. Two saws in one. Can’t beat that!
In this picture, you can see me cutting a tenon. I like to stay about 1/32” to 1/16” distance from the finished cut line. I do this because it allows some wander in the saw blade before going over the line. I then finish to the line with a sharp chisel. This creates a very accurate tenon, which in turn creates very tight joinery.
When I am hand sawing, I always cut just the lines I can see. In the picture you can see me cutting the top line and the end line. I don’t continue through into the bottom. This is done because you can’t see the bottom line and if the blade wanders you won’t catch it until it’s to late. I flip the timber over and continue on the bottom (now the top line).


