One of the bathrooms in this house had only a bathtub with a half wall for the bathtub plumbing. The home owner wanted a more useful space, so she asked us to install glass blocks to create a full wall for…
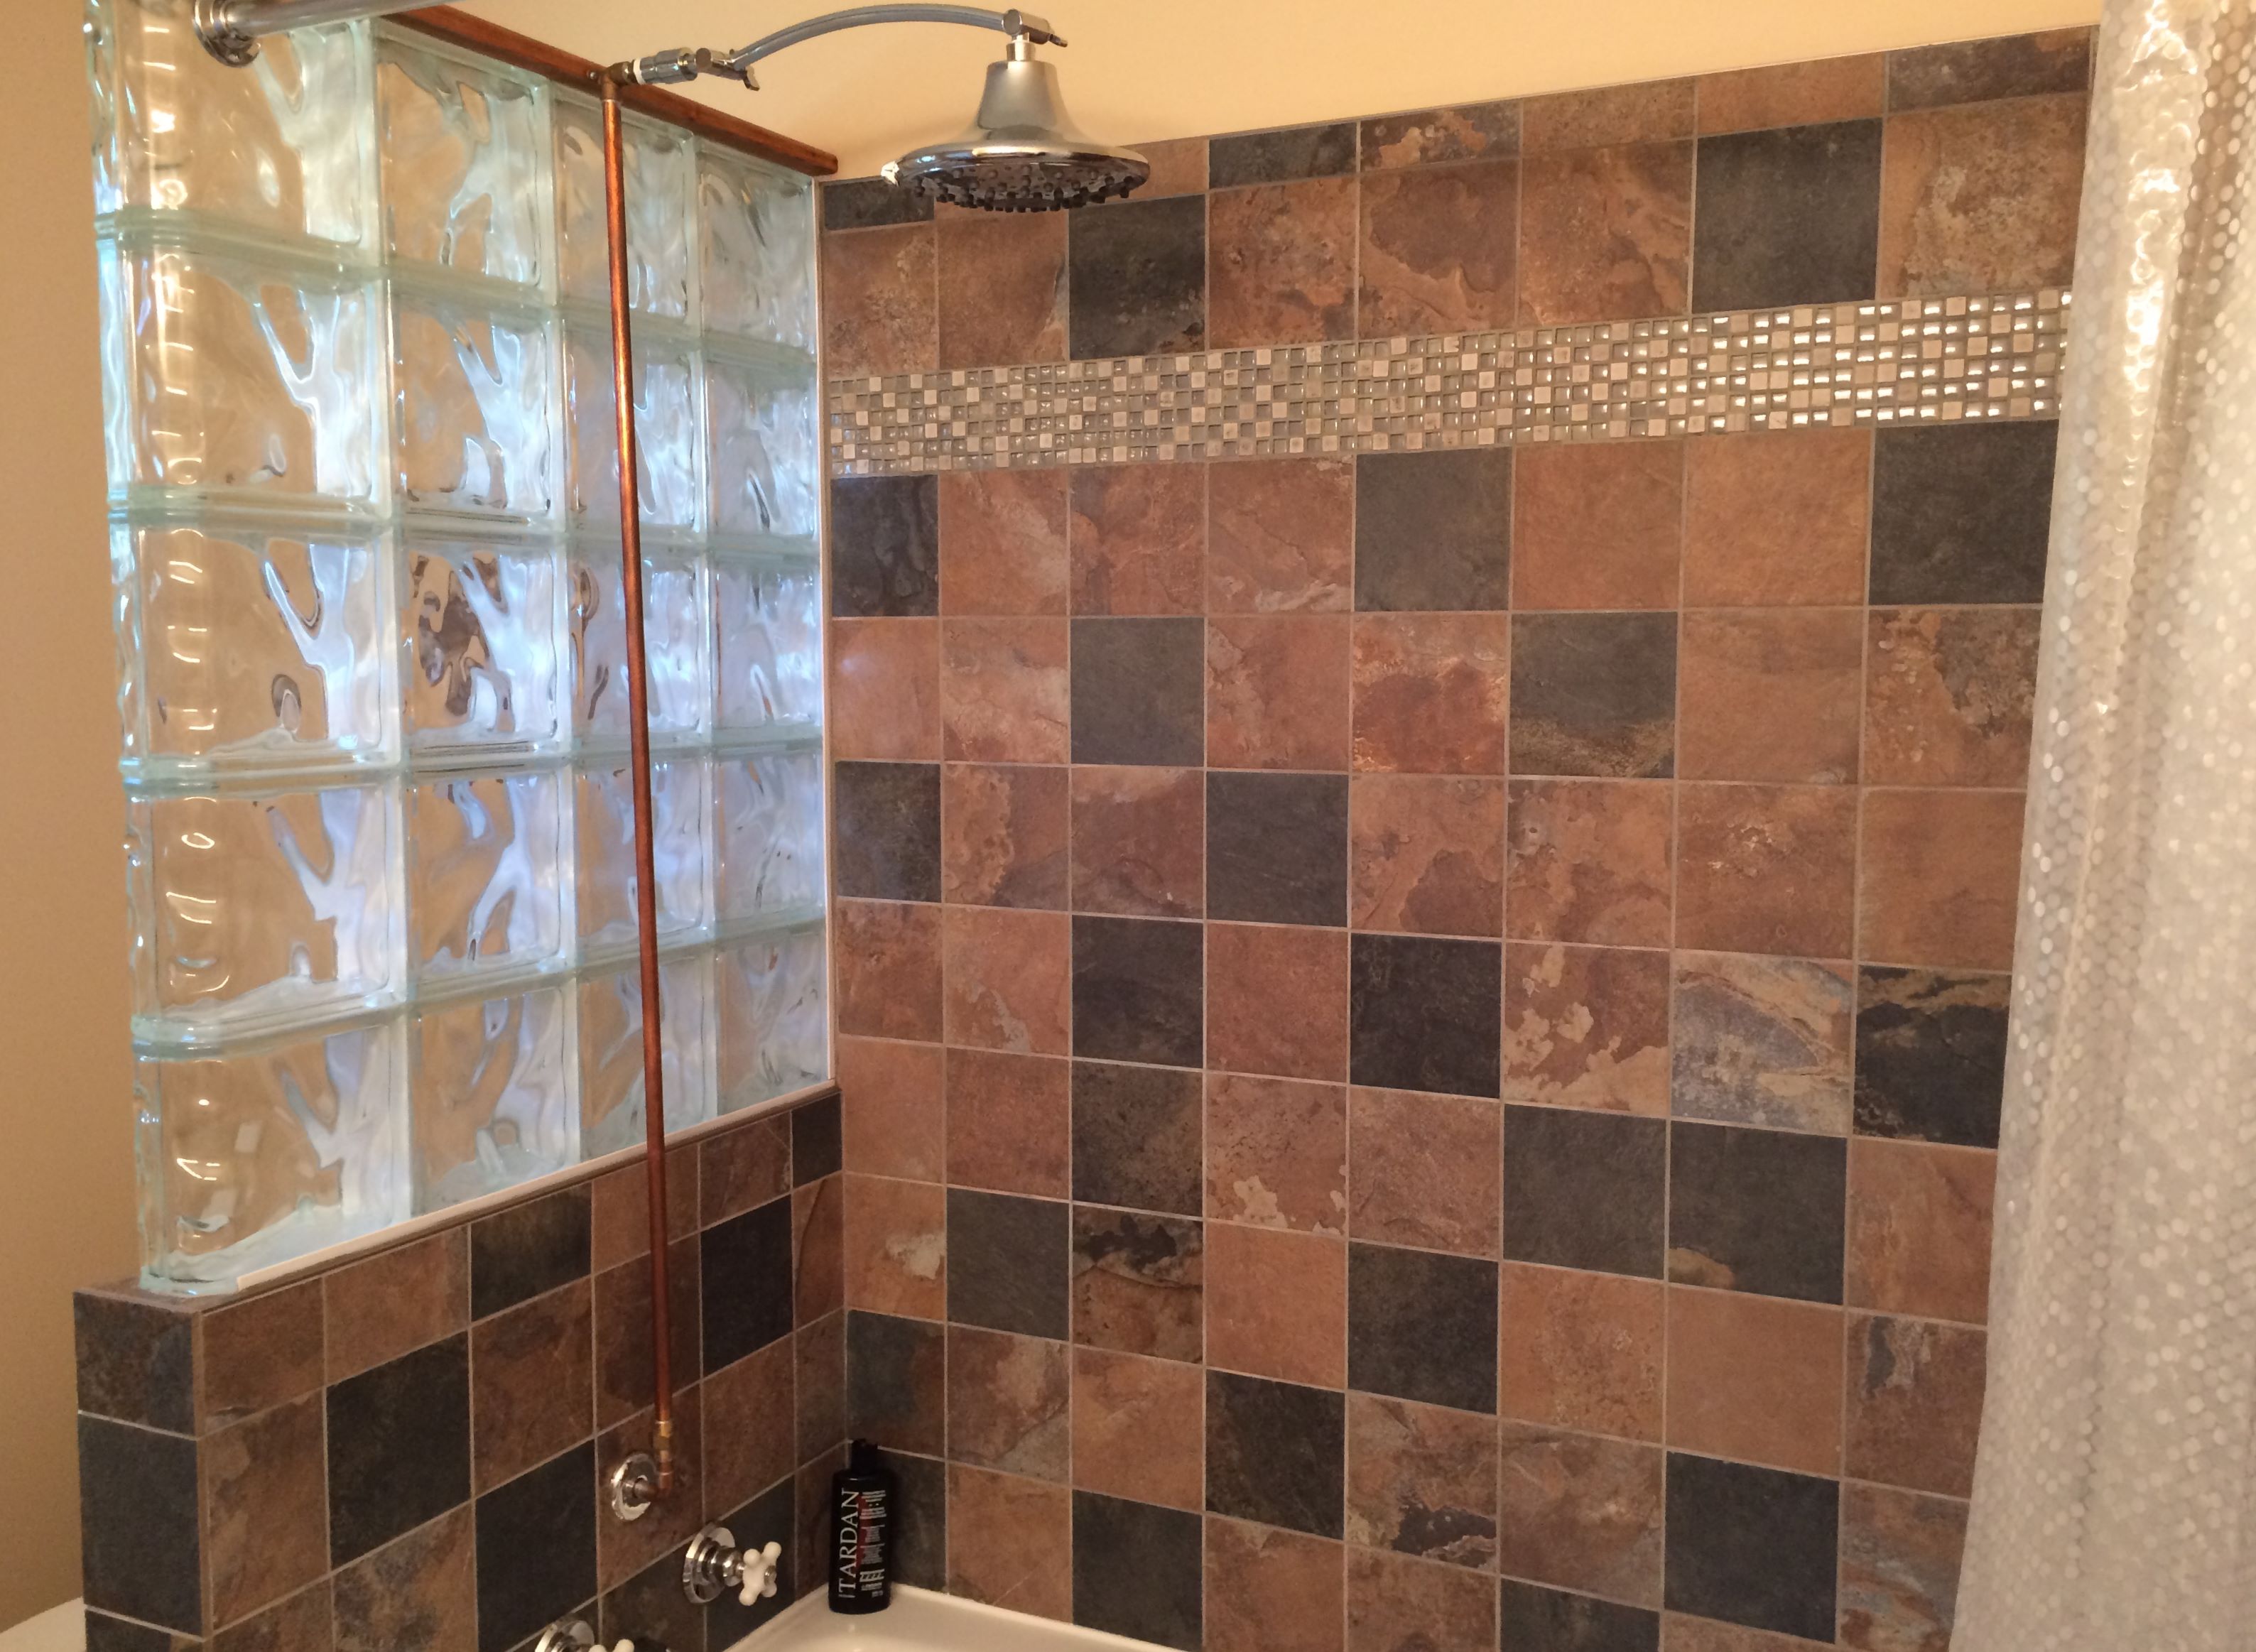
One of the bathrooms in this house had only a bathtub with a half wall for the bathtub plumbing. The home owner wanted a more useful space, so she asked us to install glass blocks to create a full wall for…
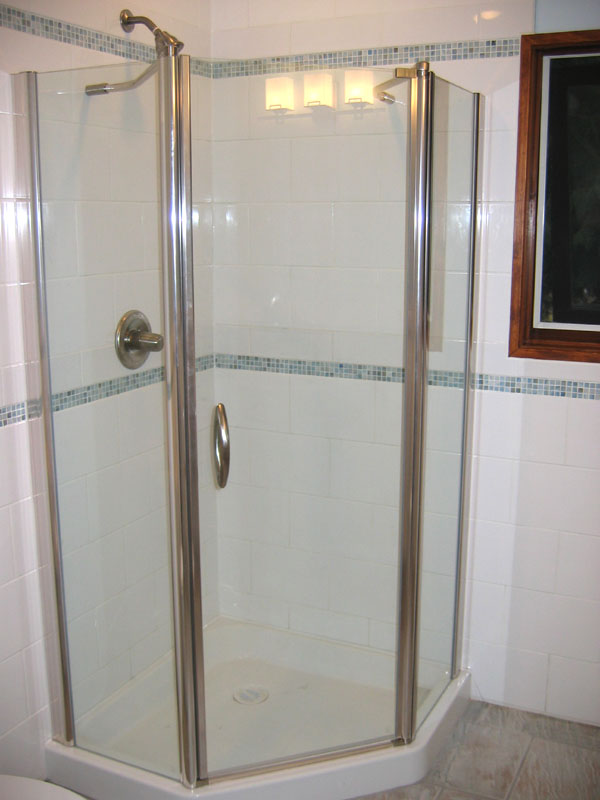
The glass shower stall chosen by the owners suited the clean lines and contmeporary look of the bathroom. We were hung up a bit on finishing the shower stall because the shower doors were back ordered, and the plumber needed…
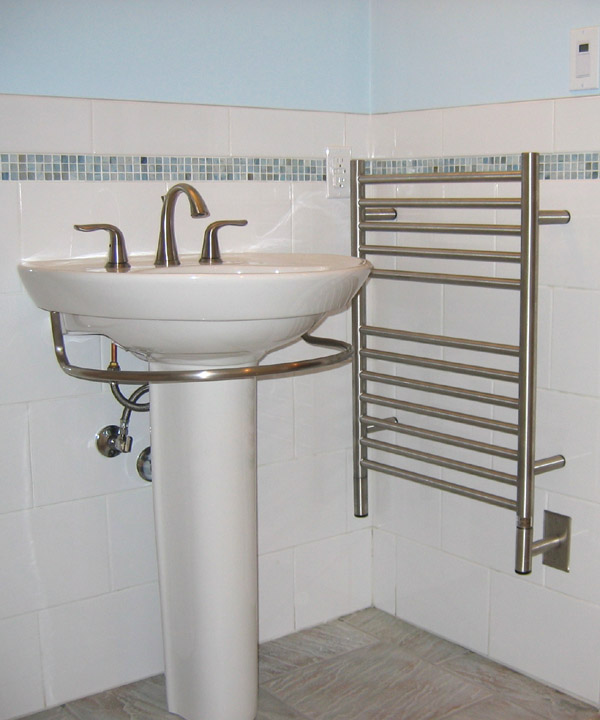
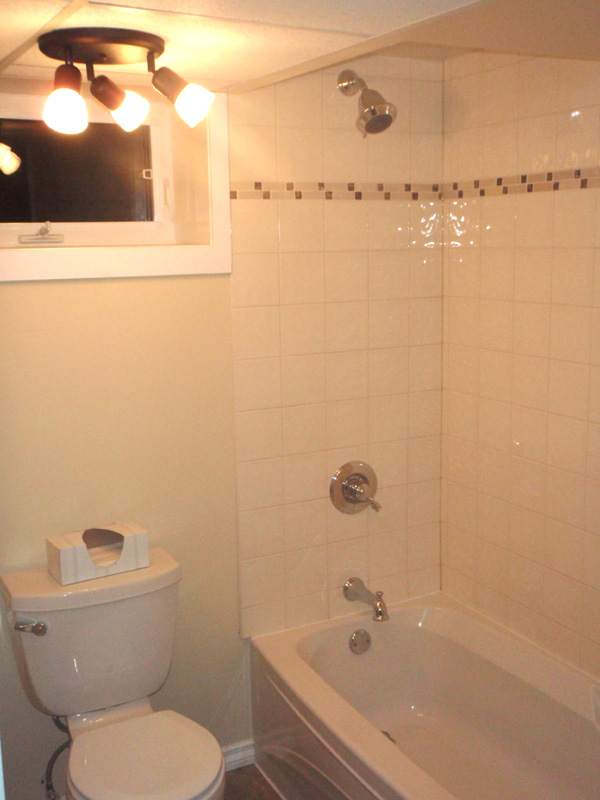
The floor tile in this bathroom was a neutral grey colour, which combined with the 8″ x 12″ white tile on the walls gives the bathroom a clean, modern look. A heated towel rack added a bit of the luxurious…
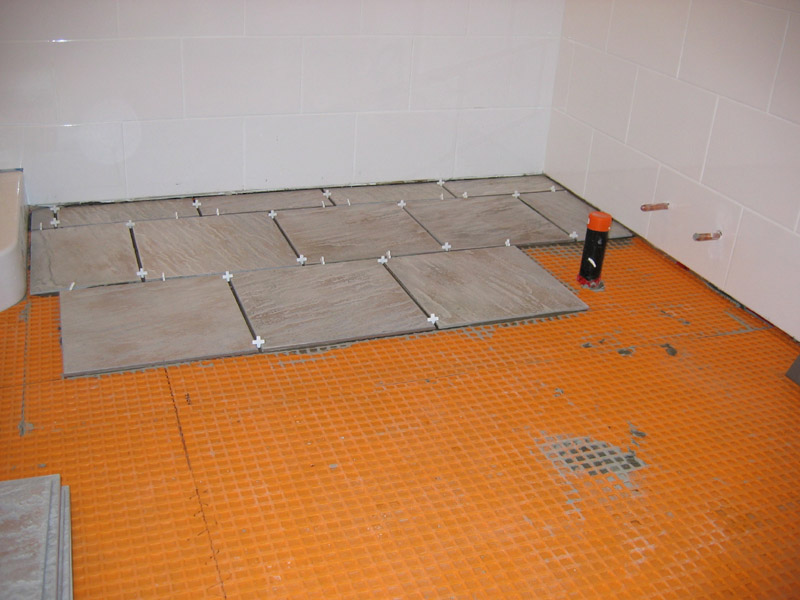
Self-leveling cement was poured over the wiring of the in-floor heat system to level the floor. Then Schluter-DITRA was layed down in preparation for the tile. Usually under tile, two layers of 5/8″ plywood subfloor is necessary for the proper…
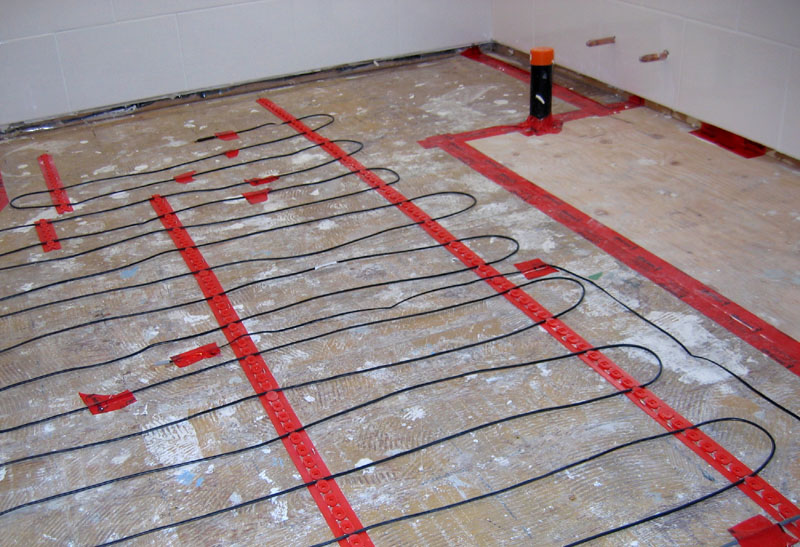
For a bathroom reno, putting an electrical in-floor heat system under the tile adds an extra luxurious touch. The only trick is making sure you have the sensor and thermostat installed correctly.
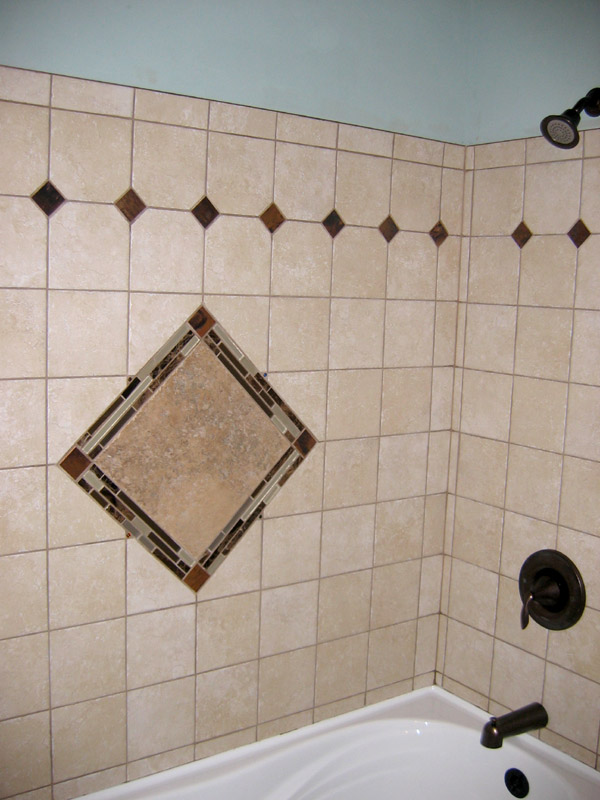
The pattern on this bathtub surround was made by using a 12″ by 12″ dark brown porcelain tile rotated to create the diamond shape and surrounded by long, thin glass mosaic tiles around the edges.
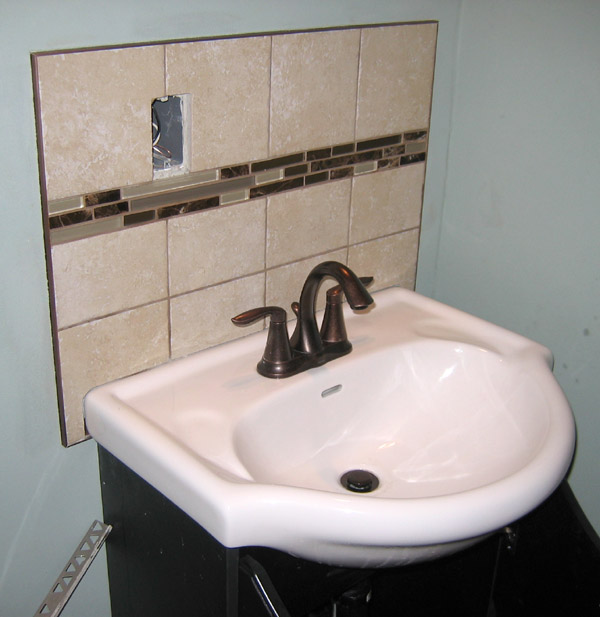
When this vanity was installed, it didn’t tie in with the rest of the bathroom until the tile backsplash was in place. The backsplash served two purposes. The first purpose was to protect the clay plaster wall behind the sink from splashing during regular use.
Due to the house being older, the floor is quite sloped at the outer walls where we put in the bathroom. This meant that the toilet and bathtub had to be shimmed to get them level.